
The curly spider plant, also known as Chlorophytum comosum ‘Bonnie’, is a unique and charming version of the classic spider plant. Its curly leaves bring a touch of character to any space, and it’s incredibly easy to care for, making it a perfect choice for any plant lover. On top of that, it helps purify the air in your home, promoting a healthier living environment.
In this blog, I’ll answer 27 of the most common questions about the Bonnie curly spider plant, covering everything you need to know to grow and care for it successfully.
Overview of the Curly Spider Plant
Q1: What is the Curly Spider Plant?
The Curly Spider Plant is a unique and charming variety of the classic spider plant. It’s loved for its curly, wavy leaves and easy-going care routine. This plant is a perfect match for both beginners and experienced gardeners.
- Scientific Name: Chlorophytum comosum ‘Bonnie’
- Family Name: Asparagaceae (the asparagus family)
- Key Features:
- Curly, twisted leaves that grow in a spiral pattern
- Green leaves with pale yellowish stripes running through them
- Occasionally blooms with small white flowers in spring
- Produces “pups” (baby plants) at the end of long stems, similar to other spider plants
- Origin: Native to South Africa, this plant was discovered as a natural variation of the classic spider plant.
Q2: How Does the Curly Spider Plant Differ from the Traditional Spider Plant?

All of them are amazing, but the Curly Spider Plant brings some unique vibes that set it apart from the traditional spider plant (Chlorophytum comosum). Let’s break it down:
- LEAF SHAPE:
- Traditional Spider Plant: Has long, straight leaves that spread outward, giving it a bushy appearance.
- Curly Spider Plant: Shows off tightly curled, spiral-like leaves that look compact and super stylish.
- SPACE REQUIREMENTS:
- Traditional Spider Plant: Needs more room because of its spreading, straight leaves, making it better for larger spaces.
- Curly Spider Plant: A great pick for smaller spaces since its curly leaves keep it compact.
- VISUAL IMPACT:
- Traditional Spider Plant: Simple and classic, it’s a go-to for hanging displays.
- Curly Spider Plant: Stands out with its bold, quirky design, making it an eye-catching decor piece.
- BABY PLANTS (SPIDERETTES):
- Both types produce cute little “spiderettes” on long stems that cascade down, perfect for propagation into new plants.
If you want a smaller, unique version of the classic spider plant, the Curly Spider Plant is a great choice. It’s easy to care for and adds a fun, stylish look to any space!
Q3: What Are the Notable Features of the Bonnie’s Curly Foliage?
The Curly Spider Plant’s foliage is truly its standout feature. Its unique curls give it a distinctive charm, making it a beautiful addition to any space. Let’s see what makes it so special:
- SIGNATURE CURLS: The leaves twist into tight Spirals instead of growing straight, giving the plant a fun, curly vibe. This makes it look compact and full, which is perfect for small spaces or as a standout piece in your plant collection.
- STRIPED LEAVES: Bonnie’s leaves have cream or white edges that create a striking striped look. It adds a classy touch and makes the plant even more eye-catching.
- VERSATILE STYLE: With its curly foliage, it fits like a charm in modern or rustic home decor. It’s perfect for adding a fresh, lively feel to your home, no matter your style.
Varieties of Curly Spider Plants

Q4: Are There Different Types of Curly Spider Plants?
Yep, there are two main types of Curly Spider Plants. Here’s what you need to know:
- VARIEGATED : This one’s the most popular. Its green leaves have creamy white or yellow stripes along the edges, giving it a bright and lively look. It’s perfect if you want a plant that pops with color in your space.
- NON-VARIEGATED : This version has solid green leaves with the same iconic curls. It’s simple, elegant, and great if you’re into a more classic, no-fuss style.
Q5: Which Variety is Best for Beginners?
If you’re new to plants, the VARIEGATED BONNIE is hands-down the best choice. It’s not just pretty but also super low-maintenance. Here’s why beginners will love it:
- VISUALLY STRIKING: The variegated Bonnie’s creamy white or yellow stripes on green leaves make it a total eye-catcher and a great decor piece for any space.
- HARDY AND TOUGH: This plant is very resilient, so it can handle a bit of neglect. It’s perfect if you’re still getting the hang of watering and plant care.
- ADAPTABLE LIGHTING NEEDS: The variegated Bonnie thrives in bright, indirect light, but it’s also fine in lower-light spots, giving you plenty of options for where to place it.
With its good looks and forgiving nature, the variegated Bonnie should be your suitable option.
Q6: How Do Variegated and Non-Variegated Types Differ in Terms of Care?
Both types of Curly Spider Plants are super easy to care for, but their LIGHT REQUIREMENTS are where they differ a little. Here’s what you need to know:
- LIGHT REQUIREMENTS:
- Variegated Bonnie: Needs more bright, indirect light to keep its creamy white or yellow stripes looking vibrant. If it doesn’t get enough light, those beautiful colors might fade.
- Non-Variegated Bonnie: Handles lower light levels much better, making it a great choice for spots with less natural light.
“For the best results with your variegated Bonnie, give it a cozy spot near a window with filtered sunlight—it’ll love it!”
Pet-Friendliness of Curly Spider Plants

Q7: Is the Bonnie Curly Spider Plant Safe for Pets?
Yes, the Bonnie Curly Spider Plant is totally safe for your furry friends! According to the ASPCA, spider plants, including the Bonnie variety, are NON-TOXIC to Cats and Dogs.
That said, some curious cats might be tempted to nibble on its curly leaves because they love the texture and movement. Don’t worry—it’s not harmful. However, if they eat too much, it could cause a little stomach upset due to the fiber content in the leaves.
You can confidently add a Curly Spider Plant to your space, knowing it’s a safe and stylish choice for pet owners and plant lovers alike!
Q8: What Are the Potential Risks for Cats or Dogs?
Even though the Curly Spider Plant is safe for pets, there are a couple of things to keep in mind, especially if you have curious cats or dogs.
- LEAF CHEWING: Your pets might nibble on the leaves out of curiosity. While the plant isn’t toxic, eating too much can cause mild stomach upset due to the natural compounds in the leaves.
- CAT ATTRACTION: Spider plants, including the Bonnie, have compounds similar to catnip, which makes them extra tempting for cats. This might lead to playful chewing or extra attention from your feline friends.
Q9: How Can Pet Owners Ensure Safety While Keeping This Plant?
If you’re a pet owner, keeping you Curly Spider Plant safe from curious cats or dogs is easy with a few tricks:
- USE HANGING BASKETS OR HIGH SHELVES: Hanging your plant in a basket or placing it on a high shelf is a simple way to keep it out of your pet’s reach. It’s practical and adds a stylish touch to your home decor.
- TRY BITTER SPRAYS: For persistent pets, a pet-safe bitter spray can be applied to the leaves. The unpleasant taste will stop them from chewing while keeping both your plant and pets unharmed.
“A little creativity in placement and a bitter spray can keep your Bonnie safe and your pets happy!”
Benefits of the Curly Spider Plant
Q10: What Are the Air-Purifying Benefits of This Plant?
The Curly Spider Plant is not just a pretty face—it’s also an awesome air purifier! Having this plant in your home can actually help make the air cleaner and fresher.
In NASA’s Clean Air Study, they found that spider plants are great at removing toxins like formaldehyde, carbon monoxide, xylene and benzene from the air. These harmful chemicals often come from things like furniture, carpets, and cleaning products that we use every day.
“Spider plants, including the Bonnie variety, act like little air filters, helping to improve air quality and reduce indoor pollution.”
Q11: Does It Improve Humidity Indoors?
Yes, it is like a mini humidifier for your home! Through a process called transpiration, it releases moisture into the air, helping to make your space feel more comfortable—especially in dry seasons.
- TRANSPIRATION: The Bonnie takes up water through its roots and lets moisture out through its leaves, naturally adding humidity to the air.
- INCREASES HUMIDITY: This process helps combat dryness, which is super helpful during winter or if you live in a dry climate.
Q12: How Can It Enhance Mental Well-Being?
It’s also great for your mental health! Studies show that having houseplants around can help with reducing stress level and making you feel more at ease.
- REDUCES STRESS: Taking care of plants like the Bonnie—watering, trimming, or just admiring its curly leaves—can be super relaxing. It’s a simple way to unwind after a long day.
- IMPROVES FOCUS: Plants like the Bonnie can also help you stay focused and productive, making them perfect for your desk or study area.
Care Guide for Curly Spider Plant

Q13: What Are the Ideal Lighting Conditions for This Plant?
The Curly Spider Plant loves just the right lighting to stay vibrant and healthy. Here’s what you should know:
- BRIGHT, INDIRECT LIGHT: This is the ideal spot! Put your Bonnie near a window with soft, filtered sunlight—like behind a sheer curtain. This way, it gets enough light without getting its leaves burned.
- AVOID DIRECT SUNLIGHT: Too much direct sun can scorch its leaves, turning them brown and crispy. Nobody wants that!
- TOLERATES LOW LIGHT: The Bonnie can handle low light if needed, but it’ll grow slower and may lose some of its bright, vibrant look.
“Keep your Bonnie in a spot with bright, indirect light to keep those curls lush and happy!”
By giving it the right lighting, you’re setting your Curly Spider Plant up for a long, thriving life.
Q14: How Often Should You Water a Curly Spider Plant?
Getting the watering routine right is super important to keep it thriving. Here’s a quick guide to make it easy:
- WATER WHEN THE SOIL IS DRY: Touch the top inch of the soil. If it feels dry, it’s time to water. Overwatering is a common mistake, so let the soil dry out slightly between waterings.
- AVOID SOGGY SOIL: Always use a pot with drainage holes to stop water from collecting at the bottom. Too much water can cause root rot.
- SPOT SIGNS OF OVERWATERING: Watch out for yellowing leaves, mushy roots, or a bad smell from the soil—these mean you’re overwatering and need to cut back.
- CHECK FOR UNDERWATERING: If the leaves get crispy or brown at the edges, or if the plant looks droopy, it probably needs more water.
“The trick? Less is more! Pay attention to your Bonnie—it’ll let you know what it needs!”
Q15: What Is the Preferred Soil Type for This Plant?
The Curly Spider Plant loves well-draining soil that keeps its roots happy and healthy. Getting the soil mix right can make a big difference in how your plant grows.
A well-draining potting mix with peat moss, perlite, vermiculite and regular potting soil is the way to go. The peat moss helps hold just the right amount of moisture, while the perlite ensures good drainage so water doesn’t sit around and cause root rot. Tossing in a bit of sand can improve airflow to the roots too.
“Think of the perfect soil mix as a cozy home for your Bonnie—airy, light, and never too soggy!”
Q16: How Do You Fertilize It Properly?
Feeding your Curly Spider Plant the right way can help it grow lush and full of life.
- FREQUENCY: Feed your Bonnie once a month during spring and summer when it’s actively growing. In fall and winter, cut back or skip fertilizing altogether since the plant slows down during those seasons.
- TYPE OF FERTILIZER: Use a balanced, water-soluble fertilizer, but make sure to dilute it to half strength. Too much fertilizer can harm the roots, so less is definitely more!
- SEASONAL CONSIDERATIONS: Save the feeding for the warmer months when the plant is in full growth mode. Let it rest naturally in the colder months by holding off on fertilizer.
“Stick to these tips, and your Bonnie will thank you with vibrant, curly leaves that look amazing all year round!”
Q17: What Temperature and Humidity Levels Does It Thrive In?
IDEAL TEMPERATURE RANGE: The Bonnie thrives in temperatures range of 60 to 75°F, with the capacity to endure as low as 50°F and as high as 90°F, although extreme temperatures may harm the plant . Being a tropical plant, it doesn’t handle cold well, so keep it away from chilly drafts or air conditioning vents.
HUMIDITY NEEDS: This plant prefers moderate to high humidity to stay at its best. If your home feels dry— especially during winter—try misting its leaves or using a small humidifier to give it the moisture it craves.
“A warm and humid environment is like a tropical vacation for your Bonnie—it keeps those curly leaves looking their best!”
Propagation Tips

Q18: How Do You Propagate a Curly Spider Plant?
Propagating a Curly Spider Plant is honestly one of the easiest and most satisfying plant projects ever! Those cute little spiderettes (baby plants) hanging from the parent plant are just waiting to grow into new plants. Here’s how you can do it step by step:
- CHOOSE A HEALTHY SPIDERETTE: Pick a spiderette that already have at least five leaves and about 5cm long. Make sure they’re mature enough to grow on their own.
- CUT OR DETACH: Grab some clean scissors and snip the spiderette from the mother plant, or gently pull it off if it pops away easily.
- PREPARE THE SOIL OR WATER: Decide if you want to propagate in water or soil—both work great!
- For water: Place the spiderette in a jar of clean distilled water, ensuring only the roots are submerged and change it regularly at least once a week.
- For soil: Fill a small pot with a well-draining soil mix and plant the spiderette’s roots just below the surface.
- GIVE IT BRIGHT, INDIRECT LIGHT: Put your new baby plant somewhere it can soak up bright, indirect light. Avoid harsh sunlight since the delicate leaves could get scorched.
- WATER LIGHTLY: If it’s in soil, keep the soil slightly moist but not soggy. For water propagation, swap out the water every few days to keep it fresh.
“With just a little love and care, your tiny spiderette will grow into a beautiful, curly Spider Plant!”
Q19: Can You Propagate It in Water?
Totally! Propagating a Curly Spider Plant in water is not just easy—it’s a super fun way to watch the roots grow right in front of your eyes. It’s mess-free, beginner-friendly, and pretty cool to look at.
BENEFITS OF WATER PROPAGATION:
- EASY TO MONITOR: You get to see the roots develop, so you’ll know exactly when it’s ready to move to soil.
- NO SOIL NEEDED: It’s clean and hassle-free, perfect if you’re not ready to deal with dirt.
- DECORATIVE: A spiderette in a clear jar of water makes a beautiful little display for your home!
HOW TO PROPAGATE IN WATER:
- CHOOSE A SPIDERETTE: Pick a healthy baby plant with tiny starter roots already visible.
- SNIP IT OFF: Use clean scissors to cut the spiderette from the main plant gently.
- PLACE IN WATER: Pop the spiderette into a jar of clean water, making sure the roots are submerged but keeping the leaves dry.
- BRIGHT, INDIRECT LIGHT: Keep the jar in a spot with bright, indirect light so the roots can grow strong.
- CHANGE THE WATER REGULARLY: Swap out the water every few days to keep it fresh and oxygen-rich.
“Watching those little roots sprout is like having a front-row seat to plant magic—it’s awesome!”
Once the roots grow to about 1-2 inches long, you can either plant your spiderette in soil or leave it in water for a minimalist, decorative vibe.
Q20: How Long Does Propagation Take?
Propagating a Curly Spider Plant is a fun process, but it does take a little patience! On average, it takes 2 to 4 Weeks for roots to fully develop, depending on how you propagate and the care you give.
- IN WATER: You’ll notice tiny roots starting to grow within 7 to 10 Days, and by about 2 Weeks, they should be long and strong enough to move into soil.
- IN SOIL: Root growth takes a bit longer since you can’t see it happening, but give it 3 to 4 Weeks for the spiderette to establish itself in its new home.
“A little patience makes all the difference—once those roots are ready, you’ve got a thriving new plant to enjoy!”
By giving it bright, indirect light and proper care, you’ll have a happy new Curly Spider Plant growing in no time.
Extra Care
Q21: How to Prune a Spider Plant ?
Spider plants need a little haircut to keep them healthy and looking good. Pruning your spider plant isn’t hard at all—it’s like giving your plant a quick makeover. Let me show you how!
Steps to Prune a Spider Plant:
1. Grab Your Tools
- You’ll need a pair of sharp scissors or pruning shears (make sure they’re clean).
- Also, grab a damp cloth to wipe the tools and keep your plant safe from germs.
2. Find the Leaves to Cut
- Look for leaves with brown tips, yellow spots, or any that just look sad.
- Check for parts where the leaves are super crowded or tangled.
3. Snip, Snip!
- Cut off the damaged or brown leaves close to where they grow from the plant.
- If your plant has spiderettes (those cute baby plants), you can trim their stems if you want to make space or grow them separately.
4. Clean Up Time
- Wipe down your plant’s leaves with a damp cloth to remove dust.
- Throw away the cut pieces, and ta-da! Your spider plant looks fresh again.
Pruning is super easy and keeps your plant happy. Plus, it’s a great way to spend some chill time with your favorite green buddy!
Q22 : How to Easily Pot and Repot a Spider Plant ?
Spider plants are low-maintenance and absolutely thrive when you give them the right space to grow. Potting or repotting them might sound intimidating, but it’s actually super easy—and your plant will thank you for it!
WHEN TO REPOT A SPIDER PLANT ?
Spider plants like to stretch their roots, so look out for signs that your plant is root-bound (like roots sticking out of the drainage holes or the soil drying up too quickly). Ideally, repot every 1-2 Years or when it seems cramped.
HOW TO POT OR REPOT ?
1. PICK THE RIGHT POT
- Choose a pot slightly bigger than the current one (about 1-2 inches larger). Make sure it has good drainage holes and also consider that the pot made from breathable materials such as concrete, terracotta, or ceramic .These materials promote better airflow to the roots, contributing to a healthier root environment.
2. PREP THE SOIL
- Use a light, well-draining potting mix. I like to mix in a little perlite for extra drainage.
3. REPOT WITH CARE
- Gently remove the plant from its old pot and shake off excess soil.
- Place it in the new pot, making sure the roots are spread out. Fill in with fresh soil and pat it down lightly.
WATER AND CARE
Water it thoroughly after repotting, but don’t let it sit in water. Give it some indirect sunlight, and it’ll settle in beautifully!
Repotting gives your spider plant a fresh start and room to grow—and it’s a fun way to connect with your green buddy.
Troubleshooting Common Issues
Q23: Why Are the Leaves of My Curly Spider Plant Turning Yellow?
Seeing yellow leaves? Don’t worry—it’s usually a sign that something needs adjusting in its care. Here’s how to figure it out and fix it:
- TOO MUCH WATER: Overwatering is the top reason for yellow leaves. If the soil feels soggy or smells a little funky, hold back on watering and let it dry out.
- NOT ENOUGH LIGHT: Your plant loves bright, indirect light. If it’s stuck in a dark spot, try moving it near a sunny window with filtered light—it’ll thank you!
- PESTS: Pesky bugs like spider mites or aphids can also stress your plant and cause yellowing. Check under the leaves for tiny insects and wipe them away with a damp cloth or use a safe insecticidal soap.
“Yellow leaves are like your plant’s SOS signal—fix the issue, and it’ll bounce back in no time!”
By tweaking the watering schedule, improving light, or handling pests, It will be back to its happy, vibrant self in no time.
Q24: What Should I Do If the Plant Isn’t Producing Spiderettes?
If your Curly Spider Plant isn’t growing spiderettes, don’t stress—it just needs the right care and conditions to kick-start the process. Here’s why it might not be producing babies and how to fix it:
- NOT ENOUGH LIGHT: Spider plants need proper lighting to produce spiderettes. If your plant is in a low-light spot, move it closer to a window with filtered sunlight—but keep it out of harsh, direct rays.
- LACK OF NUTRIENTS: Without proper feeding, your plant won’t have the energy to grow babies. Use a balanced, water-soluble fertilizer once a month during spring and summer to give it a boost.
- PLANT STRESS: Overwatering, underwatering, or moving the plant around too much can cause stress, which delays spiderette production. Stick to a steady care routine to keep your plant happy.
- IT’S TOO YOUNG: Sometimes, it’s just a matter of maturity. Younger plants need time to grow before they can produce spiderettes. Be patient—it’ll happen!
Q25: How Do I Handle Pest Infestations Like Spider Mites?
Spider mites are a hassle, but don’t stress—you can totally handle them with a few simple tricks.
- WIPE THE LEAVES: Grab a damp cloth and gently wipe down the leaves to clear off the mites and their webs. It’s an easy way to keep your plant clean and stop the problem early.
- USE INSECTICIDAL SOAP: Spray the leaves with insecticidal soap, paying extra attention to the undersides. This will knock out the mites without hurting your Bonnie.
- TRY NEEM OIL FOR STUBBORN BUGS: If the mites won’t give up, neem oil can save the day. Mix it as instructed and spray it all over the plant for a natural, long-term fix.
- KEEP IT CLEAN: A clean plant is a happy plant. Regularly wipe down the leaves and keep an eye out for any new signs of pests sneaking in.
Q26: What Are Signs of Root Rot, and How Can It Be Treated?
Root rot can really mess with your Curly Spider Plant, but don’t panic—it’s totally fixable if you catch it early.
SIGNS OF ROOT ROT: If your plant’s leaves are wilting, even though the soil feels moist, that’s a red flag. Another sign is a gross, sour smell coming from the soil. Check for yellowing leaves or roots that look mushy and brown instead of firm and white.
HOW TO TREAT ROOT ROT:
- Remove the Plant: Carefully take your plant out of its pot and check the roots.
- Trim Rotten Roots: Use clean scissors to snip away any squishy, brown, or black roots. Healthy roots will be firm and white.
- Repot in Fresh Soil: Pick a pot with drainage holes and use fresh, well-draining soil. Gently replant your Bonnie and go easy on the watering.
- IMPROVE DRAINAGE: Overwatering is the main cause of root rot, so make sure your pot has good drainage and never leave water sitting at the bottom.
By keeping an eye out for the warning signs and giving your plant the right care, you can save it from root rot and get it thriving again in no time.
Decorating with the Curly Spider Plant

Q27: How Can You Use This Plant in Home Decor?
The Bonnie Curly Spider Plant isn’t just a low-maintenance plant; it’s a total showstopper when it comes to decorating your home! Its playful curly leaves can instantly add charm and life to any space. Here’s how you can style it:
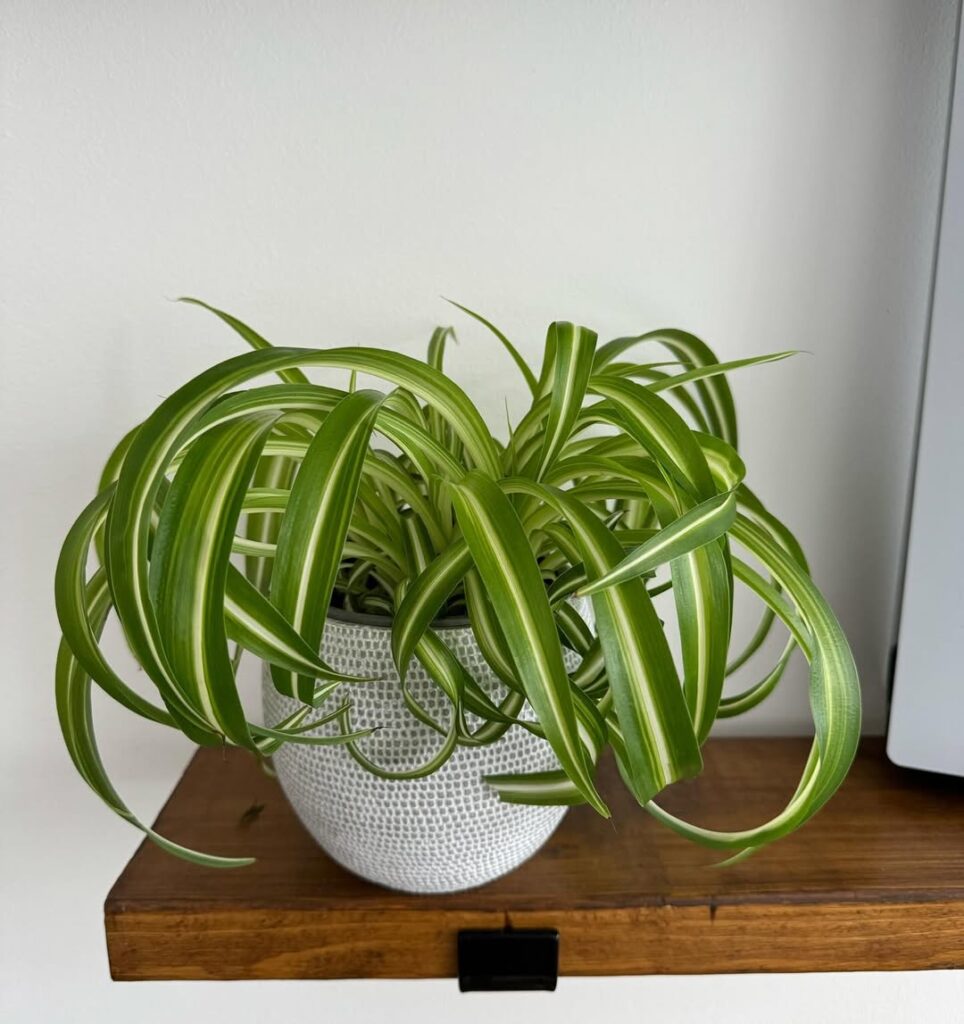
ON SHELVES: The Bonnie is the perfect size for shelves. Its curly leaves cascade over the edges, creating a beautiful green waterfall that adds a soft, cozy vibe to your room.
IN HANGING BASKETS: Want to give your space a fresh, lively look? Pop your Bonnie into a hanging basket! Its curly tendrils will dangle elegantly, creating that jungle-inspired vibe. Hang it near a bright window (but no direct sunlight) for the best results.
AS A CENTERPIECE: Make your Bonnie the star of your dining or coffee table. Use a stylish pot that matches your decor to give it a modern twist, or go bold with a colorful pot for some added flair.
ADD MOVEMENT AND TEXTURE: The Bonnie’s unique curly leaves naturally bring energy and texture to any room. Whether you’re going for a minimalist look or a boho style, this plant fits right in without missing a beat.
Conclusion
The curly spider plant is more than just a pretty addition to your indoor garden—it’s a low-maintenance, air-purifying gem that adds a unique touch to any space.
Having one in your home isn’t just about decoration; it’s a little reminder of nature’s beauty and how even the simplest plants can make a big impact.
Take care of it, and it’ll reward you with years of green, curly goodness. Trust me, once you bring one home, you’ll wonder how you ever lived without it!